
Learn how to create an export channel for Microsoft Excel files.
3. Select your sender preferences
1. Create a new CSV channel
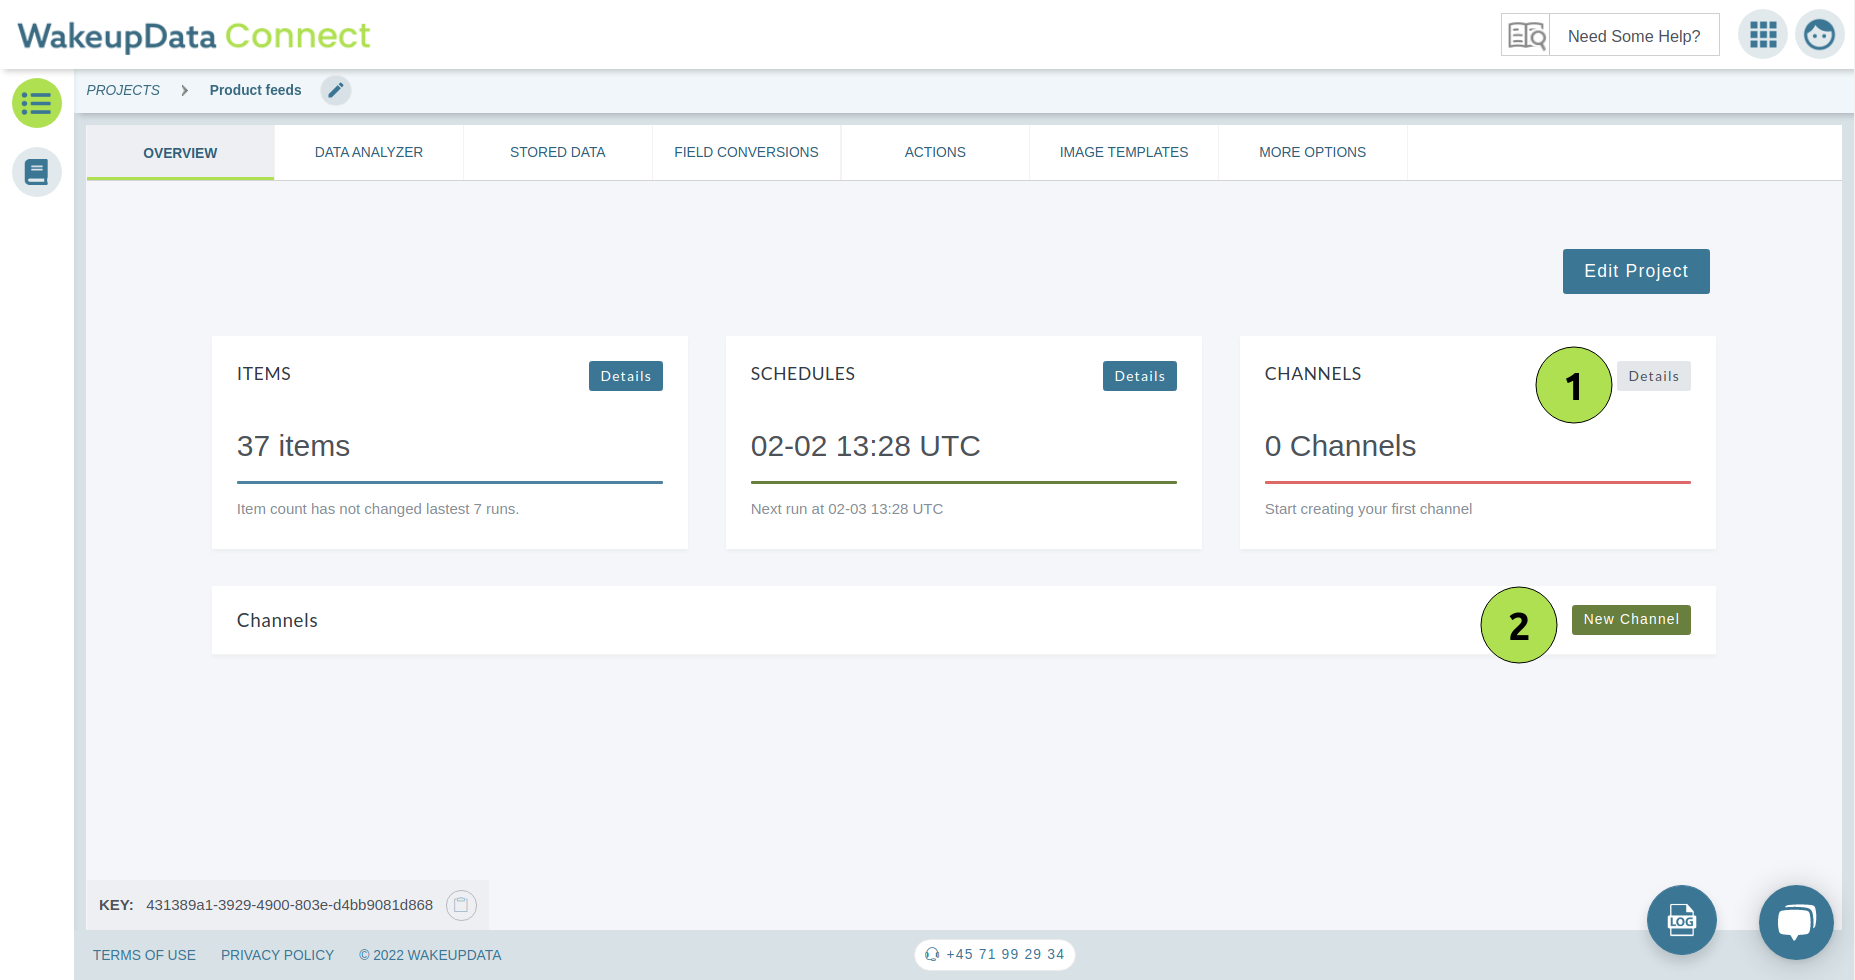
1.a. Go to your channel overview, click "Details" (1), then click "New Channel" (2).
1.b. Click "Custom" (1), then click "Excel" (2), and select "Excel - Downloaded through a URL" (3).
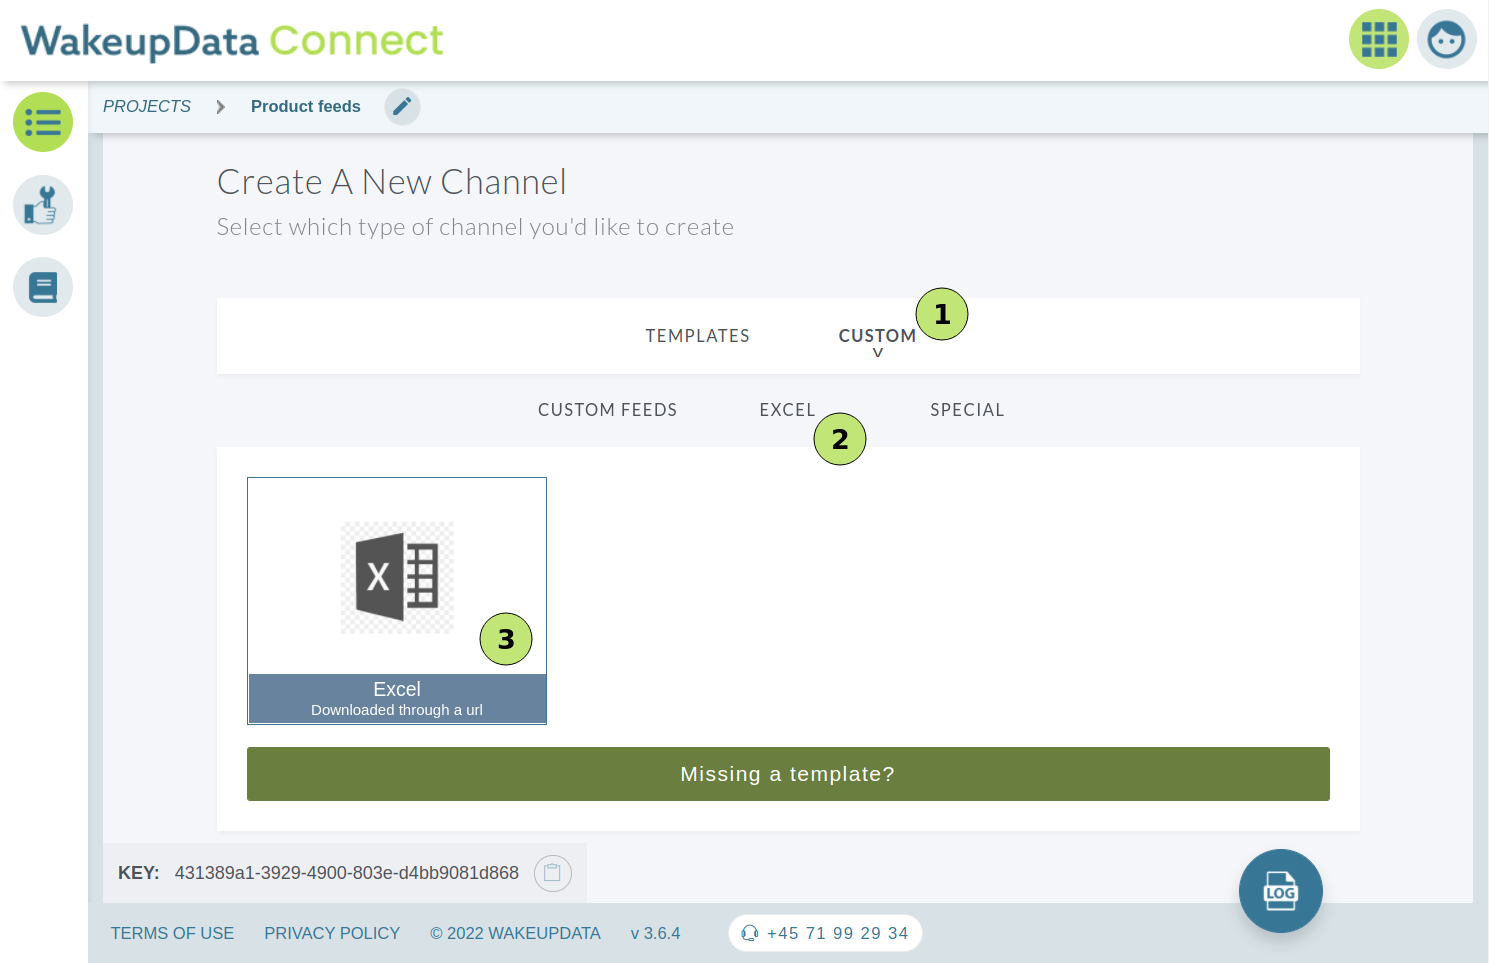
An XML feed will not be able to export to an Excel file, so be sure to select CSV.
.
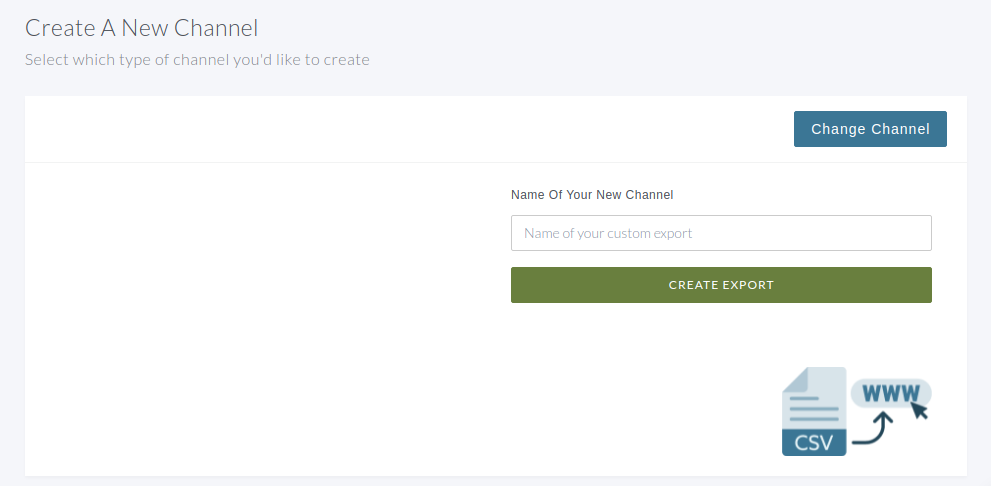
1.c. Name your custom export channel and click "Create Export".
2. Create Fields in the file
Using the transformation engine, you can now add the fields you want in your excel export.
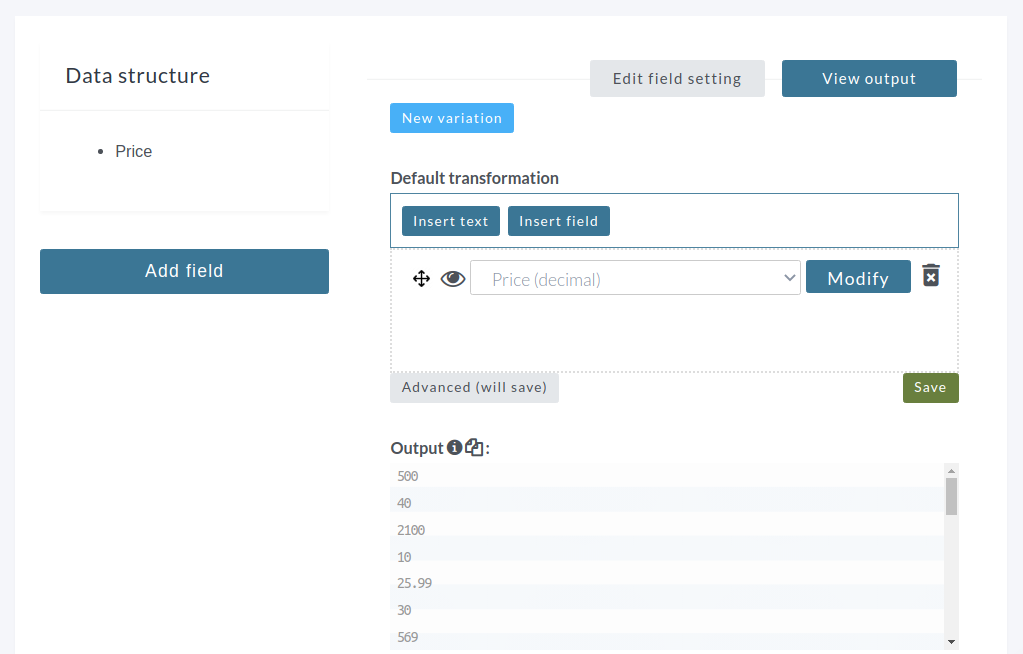
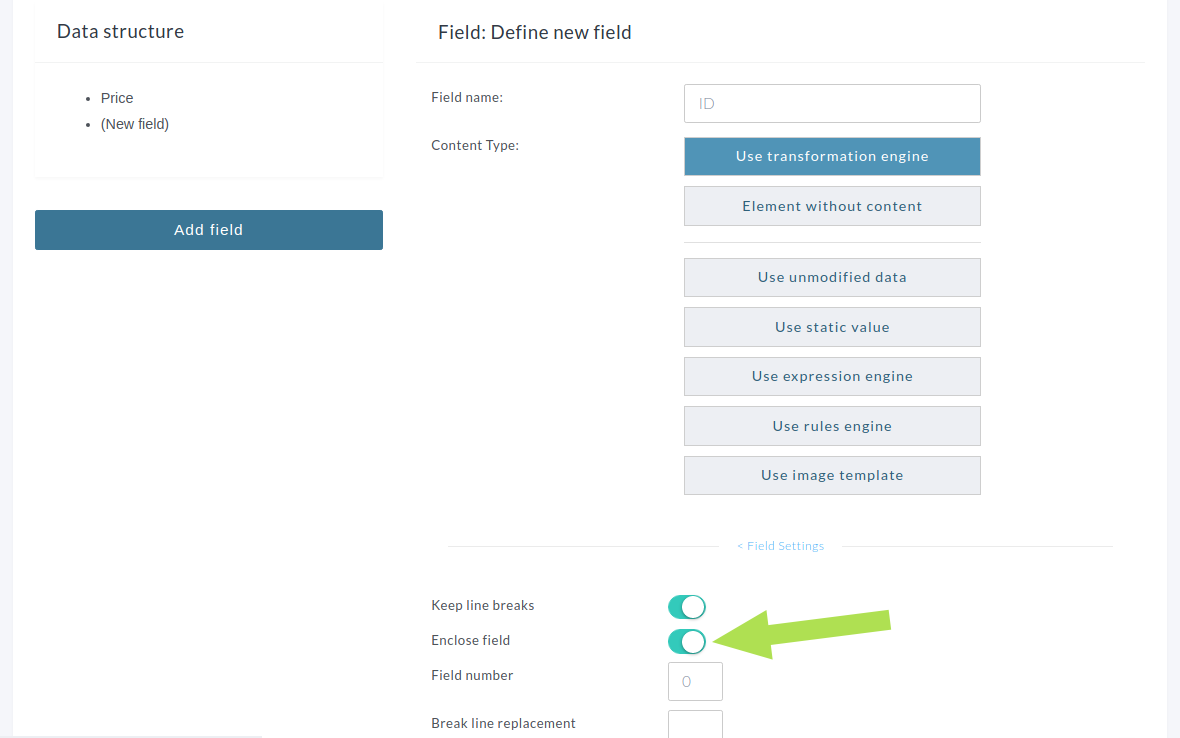
PRO TIP: If you for example want to force a number not to be formatted in excel, enable the "Enclose Field" setting as shown below.
3. Select your sender preferences
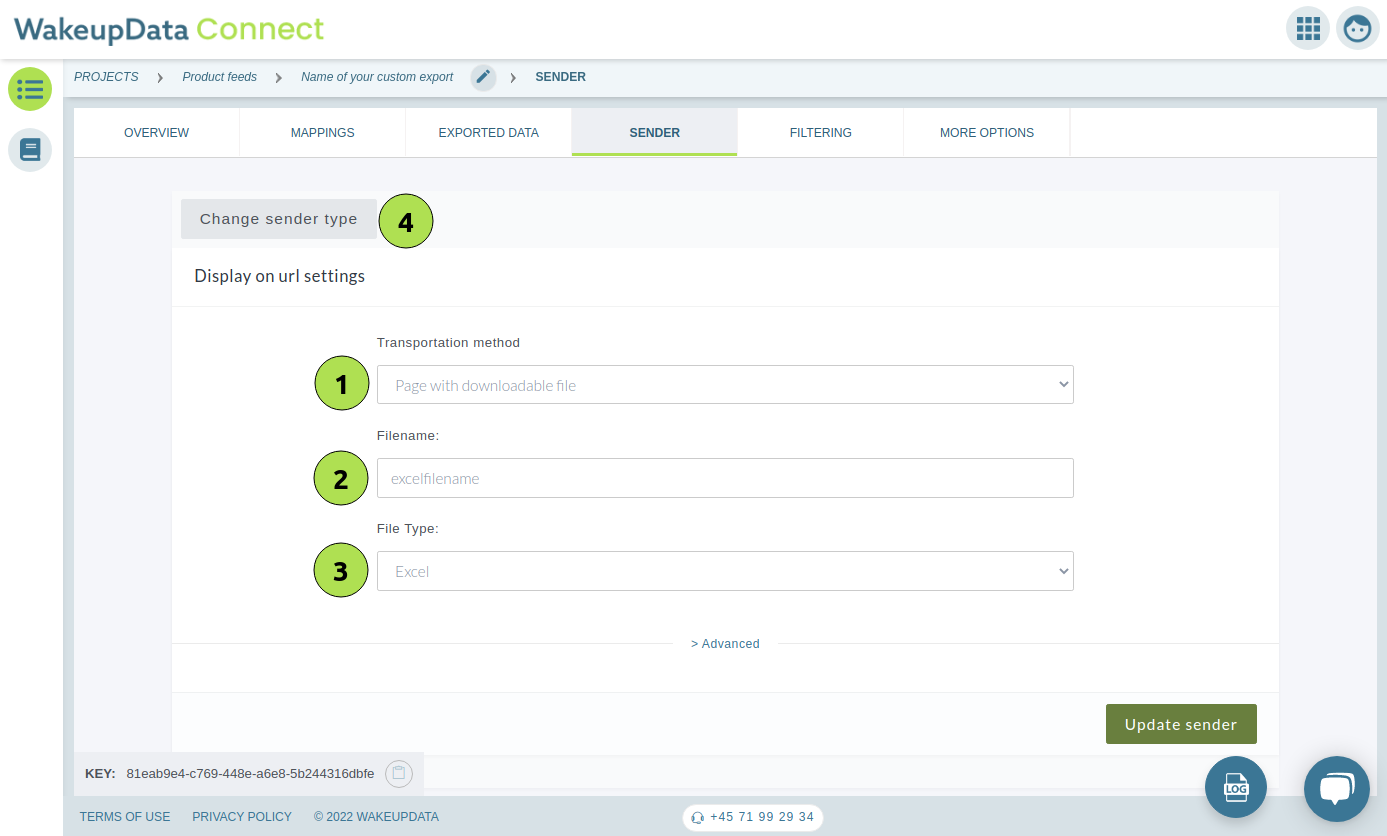
3.a. When you have finished adding your fields to the export, go to the "Sender" tab (See pro tip below if your Sender tab is missing) and select "Page with downloadable file" (1), then give your file a name (2), and select "Excel" to be the file format (3).
If you want to switch the sender type to "FTP", go to "Change sender type" (4).
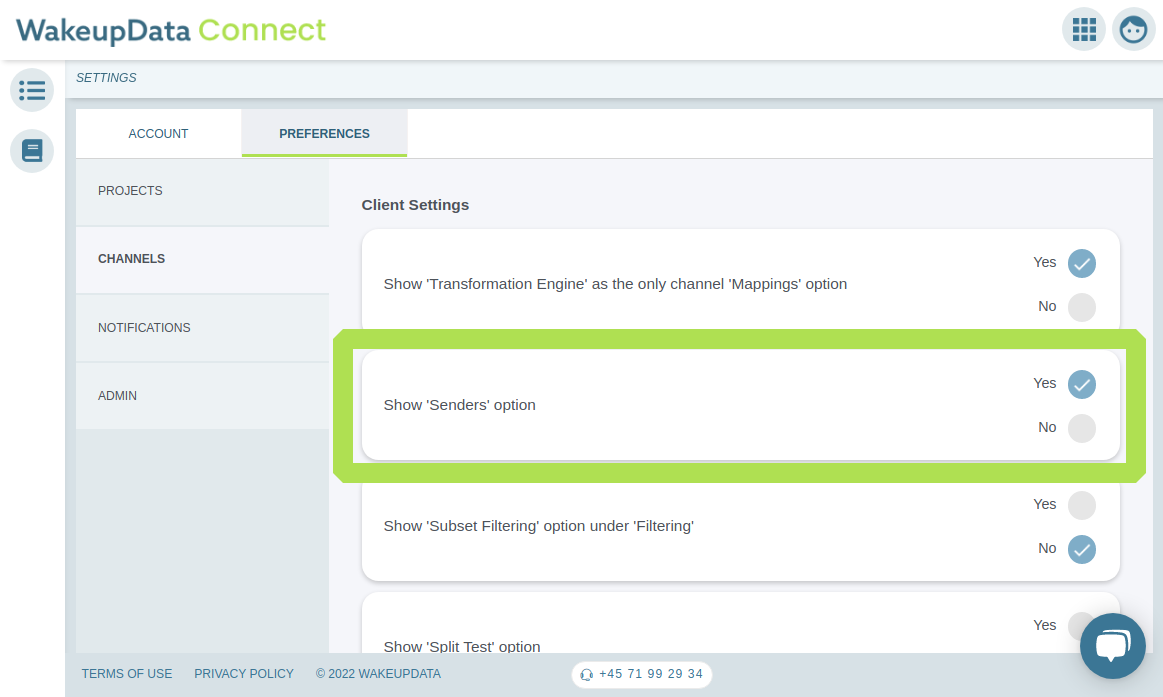
PRO TIP: Make sure you have the "Show Senders option" enabled in your Channel settings as shown below.
3.b. Below are the settings for downloadable file

NOTE: It is important to set the right file type (ie. .xlsx) or it will just generate a normal csv file.
4 Build your feed
Your Excel feed will automatically be built next time your data is imported.
If you open the channel URL and get a blank page it is because it has not yet been built.
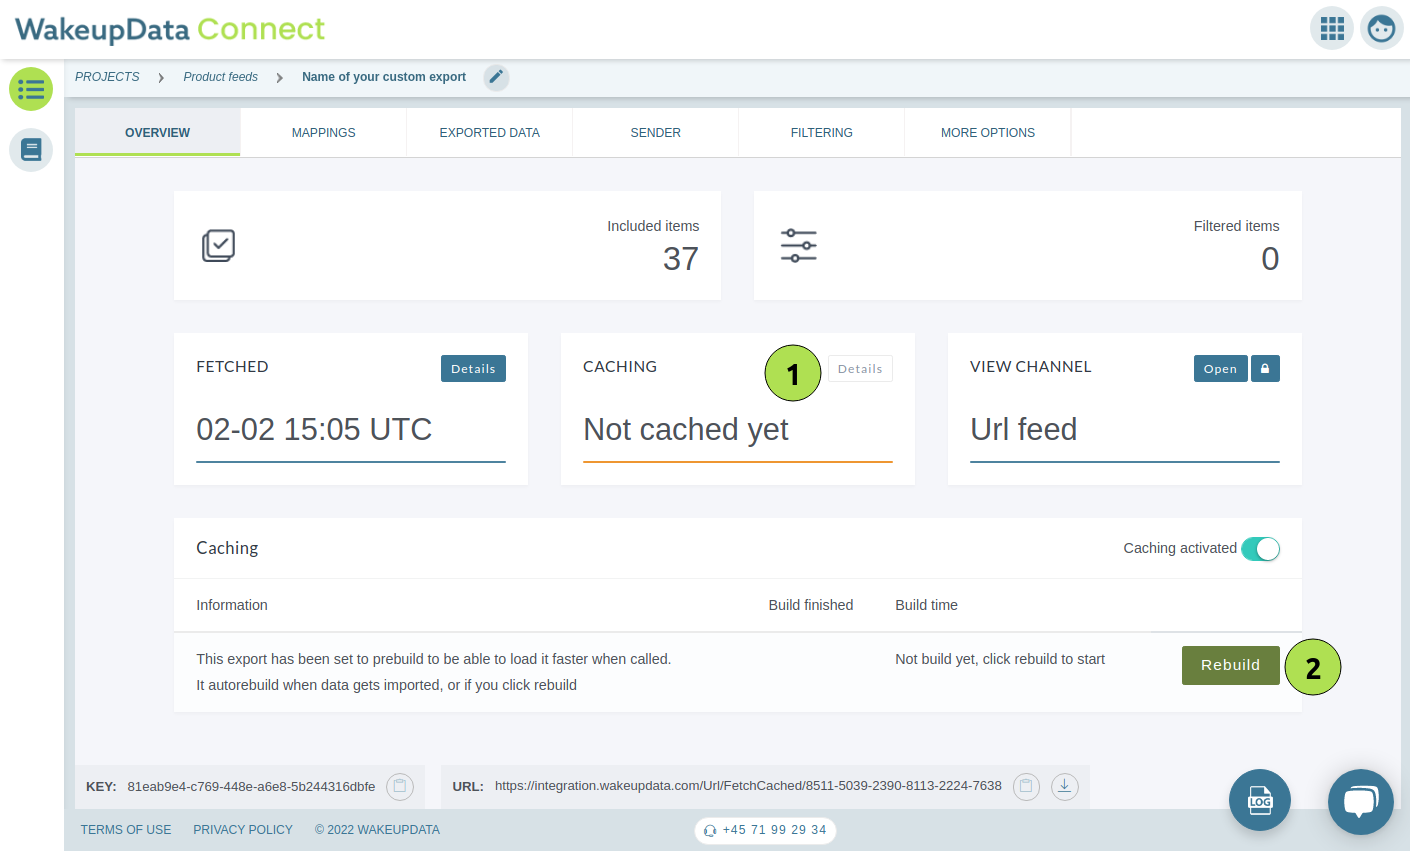
To manually build your new channel feed, go to "Caching" and click "Detail" (1), then click "Rebuild" (2).
5. You now have a working Excel channel

If you have any problems setting up your Excel product feed export, feel free to reach out to our team in the in-app chat or via support@wakeupdata.com.